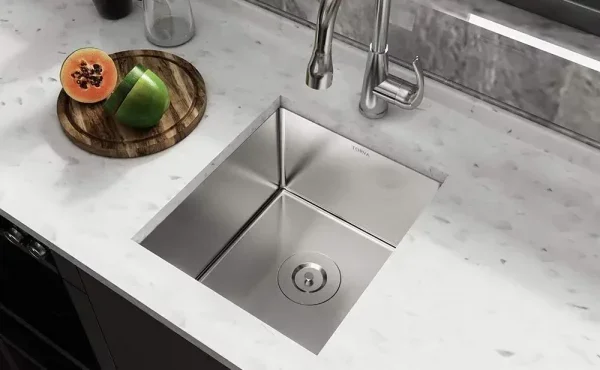
Caulking is a necessary part of any plumbing project. It’s how we seal and protect the joints and seams of our sinks, bathtubs, tiles, tub surrounds, or toilets. This article will provide you with all the information you need to caulk undermount a sink—from how to prepare your materials to how to finish up.
There are four different methods for caulking undermount sinks: with a cartridge, with a gun, with a bag, or with a tube.
Method One: Cartridge
Preparation:
– Cut the tip at a 45-degree angle to help control your flow. If you don’t, it will drip everywhere!
You Will Need:
Caulk cartridge gun, caulk or silicone caulking tube, clean cloths/paper towels for messes
Clean and dry the sink before you begin. If there’s anything on it, such as old caulk or dirt, your new caulking won’t stick very well. Plus, a clean surface is less likely to cause problems with adhesion later on down the road. Use soapy water or an all-purpose cleaner to help get rid of grease or grime. Then, use a lint-free cloth—or even paper towels if you don’t have any of those on hand—to dry it off completely.
Insert your caulk tube into your cartridge gun, making sure that the end of it is pushed all the way down into its place.
Cut off about a half-inch from the tip to give yourself enough room for controlling your flow rate. You can always cut off more later, but you can’t put any back on! This will be one of those times that you wish you had a third hand.
Start applying your caulk from about four inches down on one side of where the flange meets up with your sink, and work in either direction away from that point. Apply a generous bead of caulk—about the size of a nickel or quarter is good—around the rim as well, especially if your sink doesn’t have an overflowing plate installed yet!
Spend about ten minutes working on getting that first line completely covered. Then, lay a damp cloth down on your work surface and grab the end of it. Roll the caulk tube over it back and forth until you get all of that first bead worked into an even line for between one quarter to half-inch thick. If some bits are thicker or thinner than others at this point, don’t worry.
If you have any gaps in your caulk lines at this point, it’s time to start over. Smooth out all of the edges with a damp finger or paper towel before reapplying more caulk and repeating steps two through five until everything is covered and smooth looking.
Use a damp cloth or paper towel to wipe away any excess caulk that you applied. Then, use your finger or another clean cloth (lint-free is best) to go over the entire length of the bead and smooth it out completely. Make sure there are no ridges left behind; if there are, you can use a damp finger to smooth them out.
Let your caulk cure undisturbed for a full twenty-four hours before using the sink again or exposing it to water in any way. If that doesn’t work—if you need to use the sink right away for some reason—wrap a plastic bag tightly over it and secure it in place with a rubber band. This will help to keep the caulking from coming into contact with any moisture prematurely.
Method Two: Gun
Now let’s move on to using a caulking gun. This is probably the most common method, and it’s pretty simple. You Will Need: Caulk cartridge gun, caulk or silicone caulking tube
Cut off about a half-inch from the tip to give yourself enough room for controlling your caulk flow.
Put the caulking gun on a firm surface to help steady it, and load your caulk tube into the barrel of the caulker until you feel resistance. Make sure there is no air in the tube (you can use an up-and-down motion to expel any trapped pockets of air).
Carefully insert the caulking tube into the drain hole until it makes contact with the sink bottom. If you have trouble getting it in, use a butter knife or other thin object to help guide it in.
With one hand, hold the caulking gun steady. With the other, squeeze the trigger and apply a continuous bead of caulk around the drain hole.
Use your finger or a wet sponge to smooth out the caulk, making sure to get into all of the cracks and crevices. Don’t worry if it’s a little messy—you can always clean it up later.
Let the caulk dry for 24 hours before using your sink. If you have any trouble areas where the caulking didn’t quite stick, you can touch them up with more caulk.
Clean the caulking gun by wiping off any excess caulk with a rag or paper towel. Store it in your toolbox until you need to use it again. If there is residual caulk stuck inside, soak the tip of the tube overnight and then run hot water through it before storing; this should help clear it out.
Caulking a sink is an easy way to prevent water from seeping underneath and causing damage. By following these simple steps, you can have a watertight seal that will last for years.
Method Three: Silicone
If you’re looking for a stronger seal that can handle more moisture, silicone may be the better option for you. It’s a bit trickier to use than caulk, but it will create a longer-lasting bond.
You Will Need:
Caulk cartridge gun, silicone caulking tube, putty knife or other thin scraping tools, damp cloth or paper towel
Cut off about a half-inch from the tip of your caulking tube. Make sure to get rid of any shavings that come out with it.
Load the caulking gun with silicone, being careful not to overfill it. You may want to practice filling a caulk cartridge just so you can get used to how much goes into it at one time.
Apply the silicone in an S-like motion around your sink drain area, smoothing out any ridges or bubbles as you go. You can use a damp cloth or paper towel to wipe away any excess silicone that squeezes out the sides of your sink drain area.
Allow at least half an hour for the silicone to dry before using your sink again, and then give it another five minutes just to be sure.
If you want to seal the edges of your sink as well, use a small amount of silicone on top of the caulk. This will help keep moisture from seeping underneath your sink and causing damage down the road.
Wait at least 24 hours before using your sink again to make sure the silicone has fully cured.
Use a damp cloth or paper towel to wipe away any excess silicone that has squeezed out the sides of your sink drain area. This will keep it from hardening and making cleanup difficult later on. Allow another 24 hours for drying before using your sink again.
If the first coat of silicone doesn’t completely cover the area, or if you have any gaps in your seal, apply a second coat. Just be sure to wait at least 24 hours between coats.
There you have it – a foolproof method for caulking undermount sinks. With a little patience and the right tools, you’ll have your sink sealed in no time.
Method Four: Epoxy
If you’re looking for a longer-term solution that can handle even more moisture, epoxy may be the better option for you. It’s a bit trickier to use than caulk or silicone, but it will create a stronger bond that can last for years.
You Will Need:
Caulk cartridge gun, silicone caulking tube, putty knife or other thin scraping tools, epoxy resin and hardener (according to instructions), disposable cups or bowls, popsicle sticks or other stirring utensils, gloves
Cut off about a half-inch from the tip of your caulking tube to make it easier to squeeze out.
Pour the epoxy resin into a disposable cup or bowl. Use your popsicle stick or other stirring utensils to stir in just enough of the hardener until you see that the mixture begins thickening up. You can always add more hardener later if you need to.
Using your putty knife or other thin scraping tools, apply a thin layer of epoxy directly to the sink. Be careful not to get it on any of the surrounding areas, as it can be difficult to clean off.
Slide the caulk strip into place and press down around all of its edges. Use your putty knife to smooth out any areas that may not be sticking, such as corners or creases.
If you’d like a perfectly smooth finish, take your putty knife and run it over the top of the caulk strip once again. This will help remove any excess epoxy and give a neater appearance.
Leave the epoxy to cure for the amount of time specified on the resin’s packaging. Then you can test out your new sink!
Clean up any epoxy that you were unable to remove from the surrounding areas with either paint thinner or mineral spirits (whichever your product instructions recommend). Be sure not to use water, as this can damage some types of sink finishes. If it’s too late for that and you have already gotten epoxy on other surfaces, you may need to sand them down and re-paint.
Once everything is dry, give your new sink a test run and admire your handiwork! You’ll be glad you took the time to caulk undermount it properly.
If there are any areas that still need attention after following these steps, go back and re-apply epoxy or silicone as needed. A little bit of elbow grease will go a long way in ensuring that your sink is watertight and looks great for years to come.
In Conclusion
Caulking undermount sinks can seem like a daunting task, but with the right tools and instructions, it’s easy enough for anyone to do. Whether you go with silicone, epoxy, or another method, following these steps will give you a watertight seal that will last for years.
FAQs
A: Silicone is a good choice for just about any kitchen or bathroom surface that doesn’t get too wet. However, if you have a marble or granite sink (or another material), make sure to check the label and select an appropriate sealant.
A: If you buy a caulk gun, it will come with the necessary tools. However, if not, there are other ways to get those jobs done as well. You can use silicone caulking tubes and putty knives or scrapers for undermount sinks, but you’ll need an epoxy kit and hardener for fixing that particular issue.
A: If you have a small, hairline crack in your sink, you may be able to fix it with silicone caulk. However, if the crack is larger or goes all the way through the material, you’ll need to use a stronger adhesive, such as epoxy resin.
A: One way to ensure that your caulk strip stays put is to apply a thin layer of epoxy directly to it before pressing it into place. This will create a sticky surface that the caulking will adhere to, making it less likely that the strip will move around.
A: Your best bet for removing any unwanted residue is with a putty knife or scraper tool. They are thin enough to remove most epoxy without disturbing your sink’s finish too much.
Products Not Found


